MongoDB - Setup (No Slides, Please)
This document has been autogenerated from slides.
Database Design
Overview
The Plan
We will outline a few ways to gain access to a MongoDB server and use a MongDB client to issue commands to the database. Our discussion will include:
- running a MongDB server locally using MongoDB Community Server
, locally using a Docker image
, and remotely using MongDB Atlas - a cloud-hosted solution.
- running a MongoDB client locally by installing and using
mongosh
, and using a driver with any of today’s popular programming languages
Server Setup
Choices of server
There are several easy ways to try out a MongoDB server.
-
MongoDB Community Server can be downloaded and tried locally on your own machine for free.
-
Docker image of MongoDB can be used to run a MongoDB server in a Docker container.
-
MongoDB Atlas is a cloud-hosted database service with a free tier for new users and small-scale applications.
MongoDB Atlas
Unless instructed otherwise, students are recommended to use MongoDB Atlas.
- register using any credentials you like
MongoDB Atlas (continued)
Unless your account already has a cluster, click to create and deploy one.
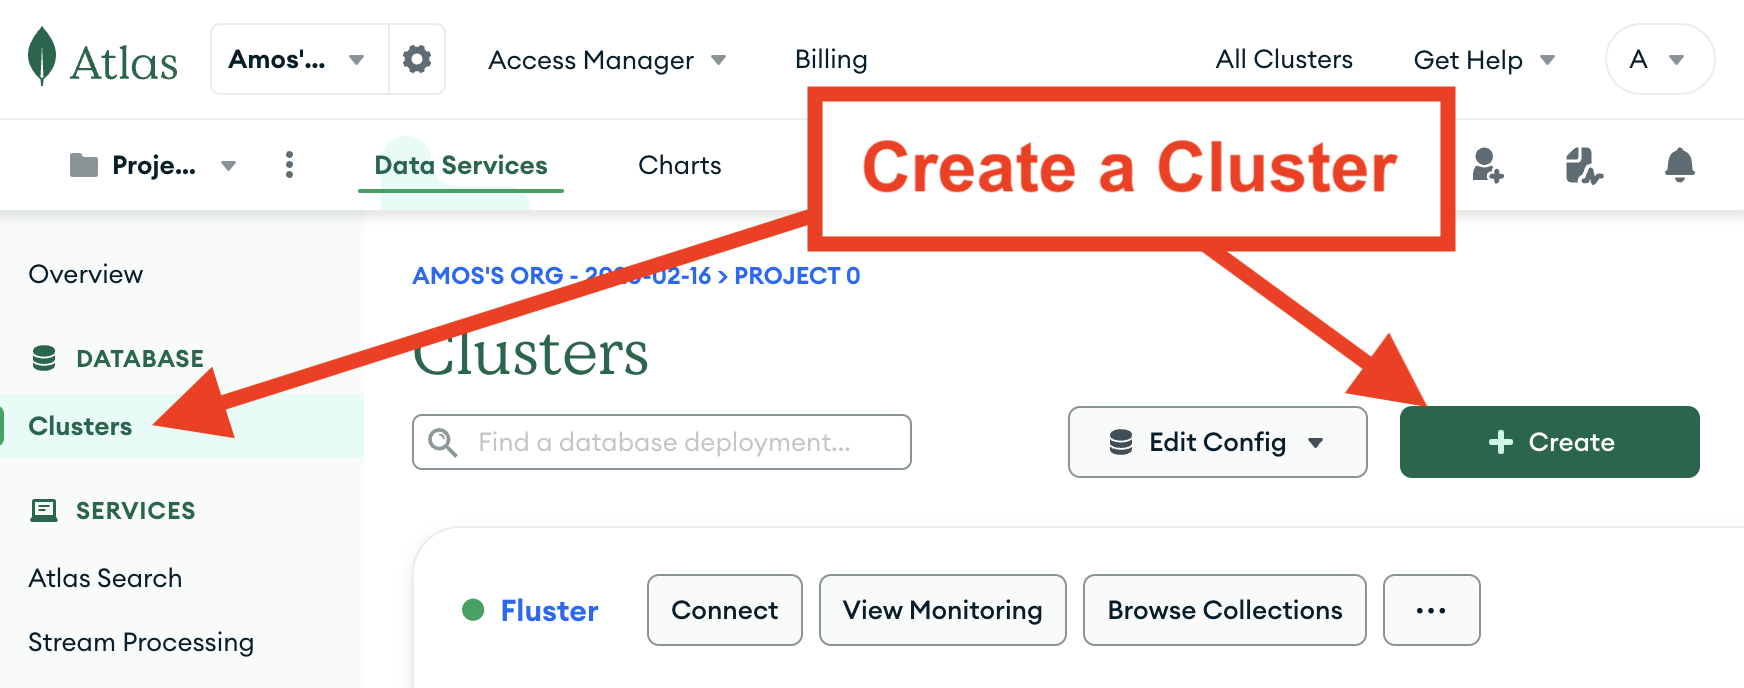
-
select the Free option
-
if asked for a “Name”, “Region”, or other cluster settings, use any you like.
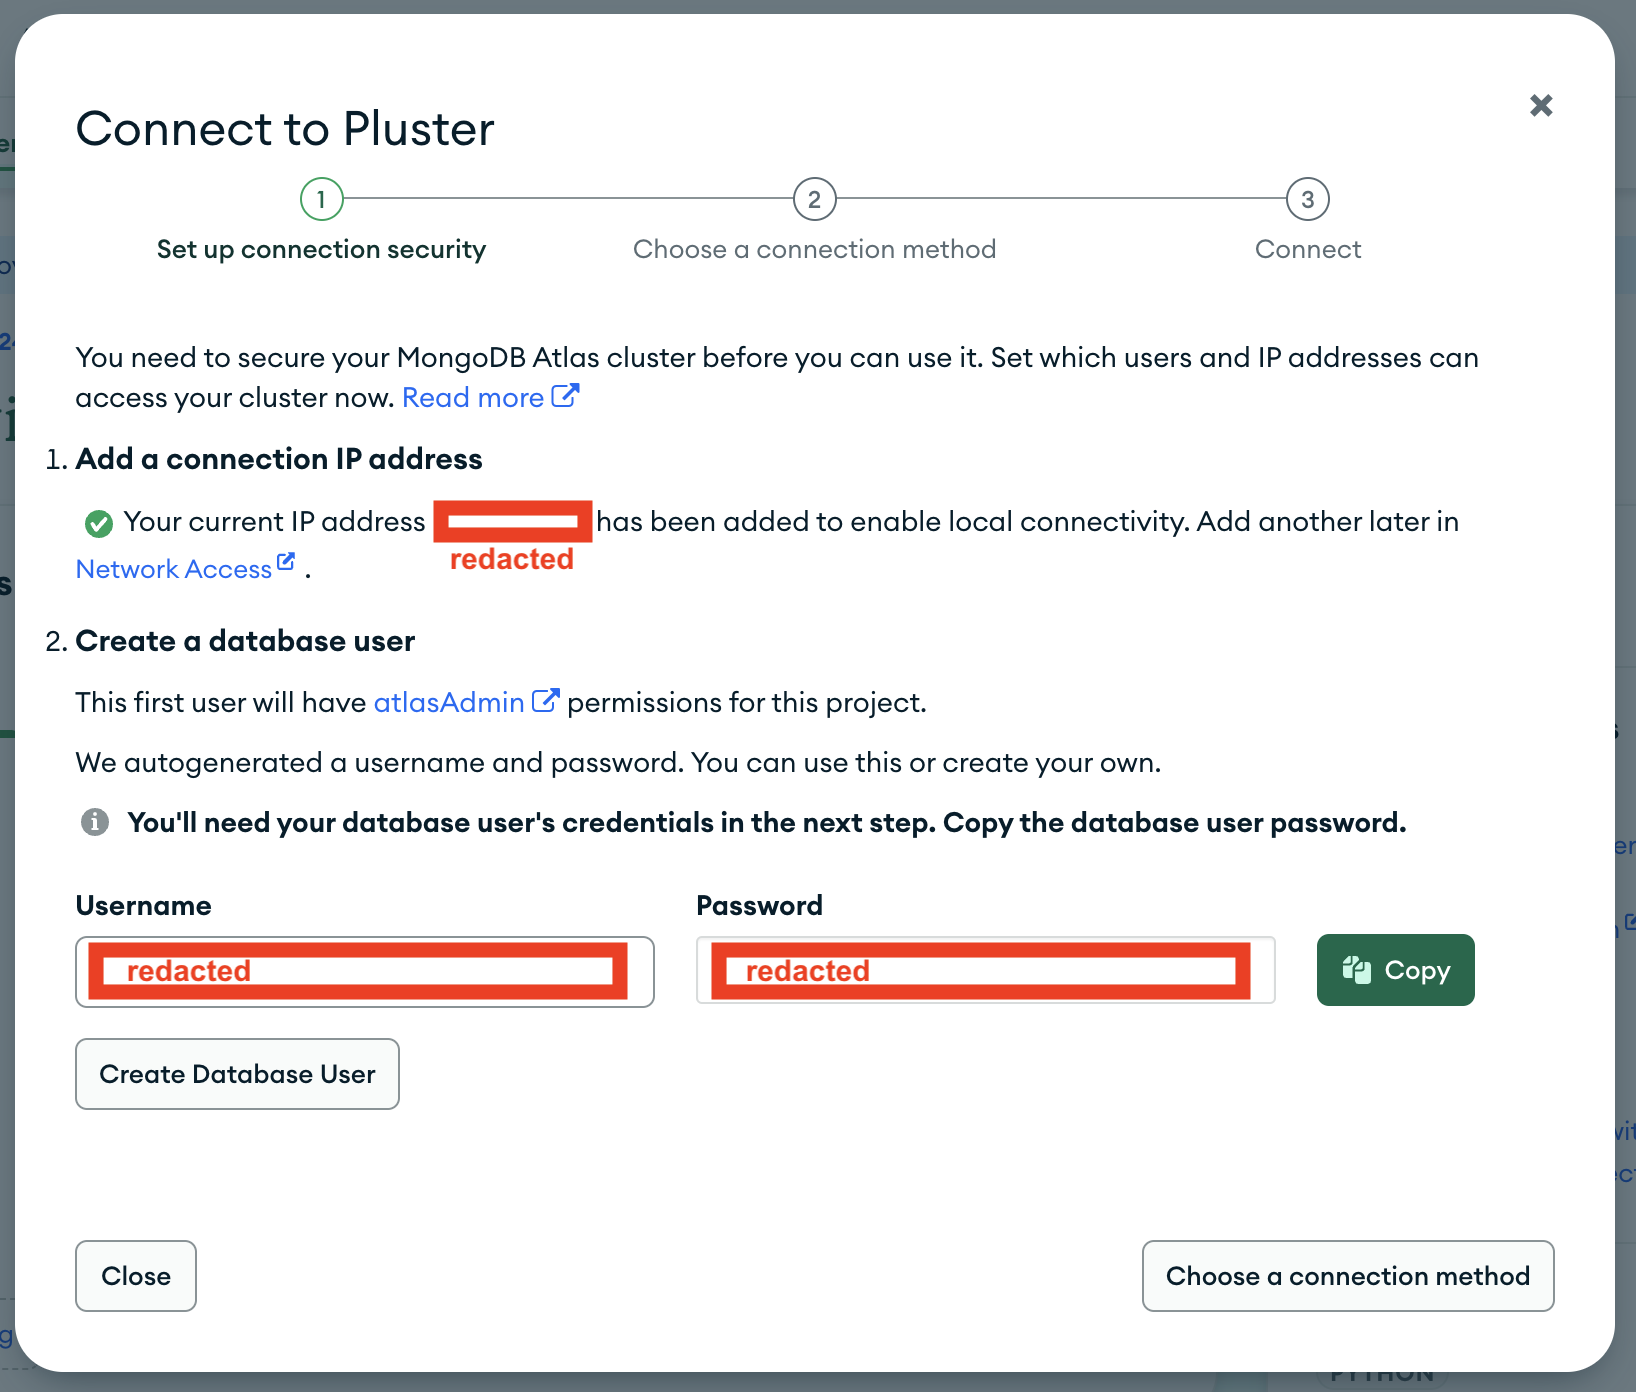
MongoDB Atlas (continued again)
There are a few access controls you will be prompted to enter:
-
Database user. You will be prompted to create a user which will be granted access to the cluster. Specify any username and password you like. Try not to lose these credentials.
-
IP address whitelisting. By default, the cluster will only allow connections from your current IP address. If you need any other IP address to be able to connect to the cluster, you can add it now or later. To whitelist all IP addresses (not a recommended practice for security reasons), you can add
0.0.0.0/0to the whitelist.
Once created, it may take a few minutes for the cluster to be deployed and ready to use.
MongoDB Atlas (continued once more)
MongoDB Atlas (continued yet again)
Once the cluster is created, the interface will provide you with Connection information, currently available by clicking the Connect button.
-
Connecting via the shell is the default method to use unless instructed otherwise.
-
Note the connection string, which will be included in the given connection command, if using shell:
mongosh "mongodb+srv://your-cluster-subdomain.mongodb.net/" --apiVersion 1 --username your-username. This is the string to connect via themongoshclient. -
Depending on how you have chosen to connect (e.g. via shell or via a driver), this connection string or command may be different.
-
The connection details may ask you to install additional software, such as
mongoshif using shell, or a driver if integrating the database into a program. Follow the instructions.
Docker container
Arguably the easist way to run a MongoDB server locally is to create a Docker container from the official MongoDB Docker image.
This is a good option if you only need the database to be accessible by you on your own machine.
To set up a server in this way, you must first…
-
create a dockerhub account.
-
run the Docker engine in the background - this is most easily achieved on personal computers by downloading and running Docker Desktop.
Docker container (continued)
To launch a local MongoDB server in a Docker container:
- run the command,
docker run --name mongodb_dockerhub -p 27017:27017 -e MONGO_INITDB_ROOT_USERNAME=admin -e MONGO_INITDB_ROOT_PASSWORD=secret -d mongo:latest
A new container named mongodb_dockerhub will be created, running the latest version of MongoDB on the default port 27017 of the local machine. The command also configures a default database user account with the username admin and password secret.
Client setup
Choices of client
Regardless of which server you use, you must access it using a client. There are a few common MongoDB clients, including:
-
mongosh- the default command line client program. Download and install from MongoDB’s shell download page, if you haven’t already. This can be run from the command line of your own local machine to connect to a server. -
mongoimportand related tools to import and export data to/from the database using the command line. -
MongoDB Compass or similar Graphical User Interface (GUI) applications that provide a visual interface through which to view and manage data in the database.
-
“driver” modules, such as
pymongoin Python ormongoosein Javascript, that allow code in any popular programming language to connect to a server.
mongosh
Assuming you have installed it locally, use the MongoDB mongosh client to connect to the database server using your database’s connection string:
-
The connection command given by MongoDB Atlas may look something like:
mongosh "mongodb+srv://your-cluster-subdomain.mongodb.net/" --apiVersion 1 --username your-database-username. You will be prompted to enter your database user password after running that command. -
If using a local server, such as MongoDB Community Server, connecting may be as simple as running the
mongoshcommand with no arguments, ormongosh --username your-username --password your-passwordif you have required a username and password. -
If running a local server in a Docker container, you can run
mongoshwithin the container with a command such asdocker exec -ti mongodb_dockerhub mongosh -u admin -p secret, where your container name and database user credentials may differ according to your setup.
mongosh (continued again)
A database server can host many databases. Before performing any data-related operations, you must select the database you wish to use.
-
show the available databases:
show dbs -
select the specific database you would like to use:
use your_db_name… this will create a new database if one does not yet exist by the given name.
mongosh (continued once more)
Once connected, prove to yourself that you are logged into a Javascript command-line interface to MongoDB.
-
Type
1 + 1and hit Enter. -
Did it respond with
2?
If so, you’re ready to start using your MongoDB database.
mongosh (continued for the last time)
To exit mongosh at any time, simply type exit and hit Enter.
mongoimport
The mongoimport command line utility is useful for importing bulk data from a text file into a MongoDB database collection. mongoimport supports JSON and CSV file formats.
-
install
mongoimportand other MongoDB Database Tools from the MongoDB Download Center -
the general pattern for using
mongoimportismongoimport --host your_database_host --db your_database_name --collection your_collection_name --username your_username --password your_password --type json --file your_data_filename.json
Conclusions
Thank you. Good luck.